 ENG
ENG


Having focused on the dental industry for more than 10 years, SHINING 3D has developed advanced digital technology to help our dentists and technicians deliver diagnosis and treatment with high accuracy, smooth workflows, and better results. Today’s case comes from Pengbo and Gengkun, experienced dentists with Arrial Dental Group. They will be demonstrating how digital technology plays a vital role in the placement of a surgical guided, anterior implant.
Fig 1: The digital technology in anterior implant
Analysis Before Treatment
Root canal perforation is a common complication in a root canal procedure. The root canal walls and the periodontal space are linked pathologically or iatrogenically, and the periodontal tissue at the perforation site will have an immediate inflammatory response.
Without thorough sterilization and good sealing of the hole, the perforation will cause inflammation in the nearby periodontal tissue. If not sealed this can lead to multiple sources of infection.
After the root canal therapy years ago, the follow-up showed alveolar bone resorption and fistula on the gingiva, also the thickness of the periodontal membrane increased. After comprehensive thinking, the dentist thought it would be difficult to achieve an ideal result with a second root canal therapy or periodontal surgery with retrograde filling. The remodeling of the periodontal tissue may cause the periodontal tissue to have an adverse effect on the aesthetics of the anterior teeth. The new treatment plan was to extract the tooth and perform immediate implant placement.
Treatment Plan
The patient’s alveolar bone plate was thin and the bone wall was intact, which is an indication for immediate implant placement. In order to ensure the ideal position of the implant, preoperative intraoral scans were taken. After scanned, the surgical guide was digitally designed and 3D printed. During the design process, there must be consideration of a safe distance between the implant and each anatomical structure. It is necessary to consider the axis orientation of the implant body and the screw access channel should be on the palatal side of the prosthesis.
Pre-operative Checking
#11 and #12 Metal-ceramic crowns. #11 No looseness, knocking (negative), one fistula was found in the remote middle gingiva of the labial side, purulent secretions overflow when pressed.
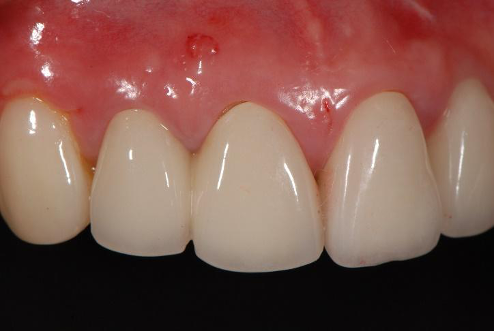
Figure 2: X-rays: High-density shadows were seen in the root canal, lateral penetration images were seen in the middle of the root, and large areas of dark shadows were seen on the root side.
Data Capture Pre-operative
After the treatment plan was determined, high-precision intraoral data of the patient was obtained by SHINING 3D’s Aoralscan intraoral scanner. The scan data was combined with high-definition CBCT data to plan the following digital implant surgical guide design.
Intraoral Scan
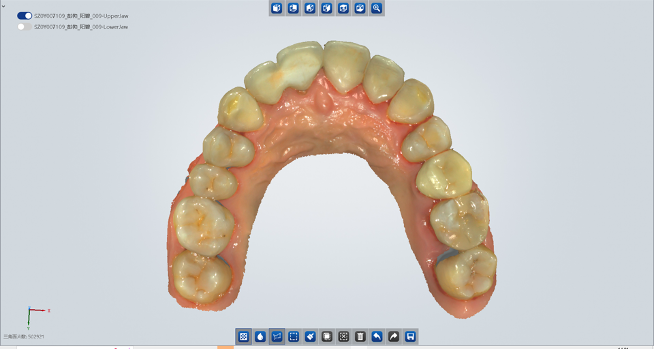
Figure 3: The intraoral scan data
CBCT Scan

Figure 4: The picture shows the relationship between the axis of the implant body and the restorations
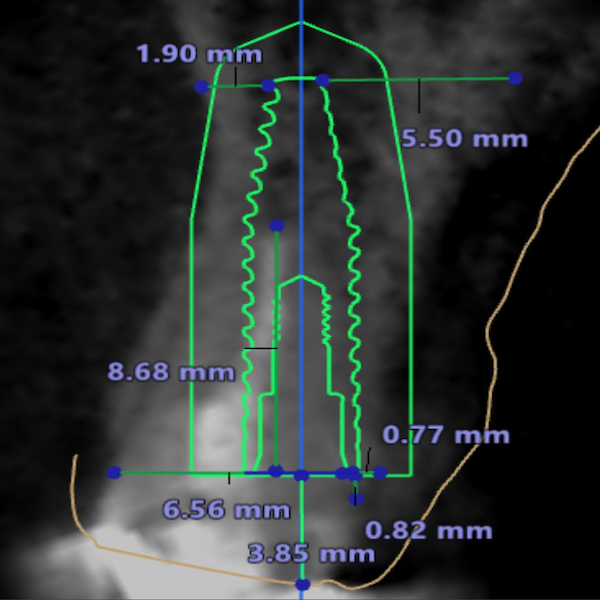
Implant Surgical Plan

Figure 5: The measurement of the implant body in bone
The Design and Print of the Surgical Guide
Using the Accuware software, the surgical guide file will be imported and ready to print. The surgical guide will go through the layout, add supports, and slice with one click. The surgical guide will be printed by AccuFab-D1s.
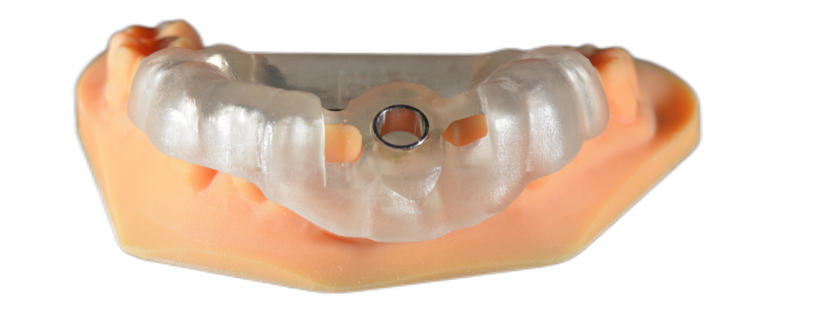
Figure 6: The printed surgical guide
The Digital Technology in Implant Surgery

Figure 7: The CBCT after surgery and the temporary restorations.
Two Week Follow Up After Surgery
In order to ensure the healing of the implant site and decrease the influence of chewing activity on osseointegration of the implant body, the dentist did not place the final restorations. Two weeks after surgery, the temporary resin bridge placed on the day of the implant was removed. A new resin restoration was replaced to ensure aesthetic results.
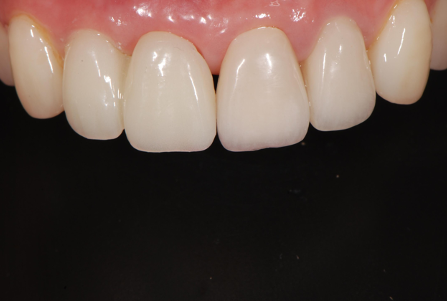
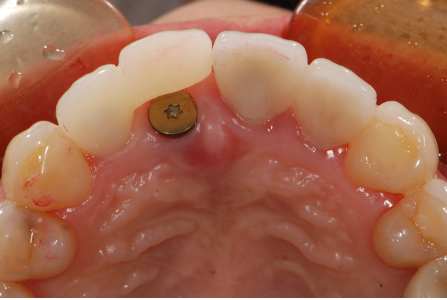
Figure 8,9: A new resin restoration is placed
Four Months Follow Up After Surgery
Four months after the implant surgery, the temporary resin bridge was removed and the intraoral data of the patient’s temporary restorations were collected using the Aoralscan 3.
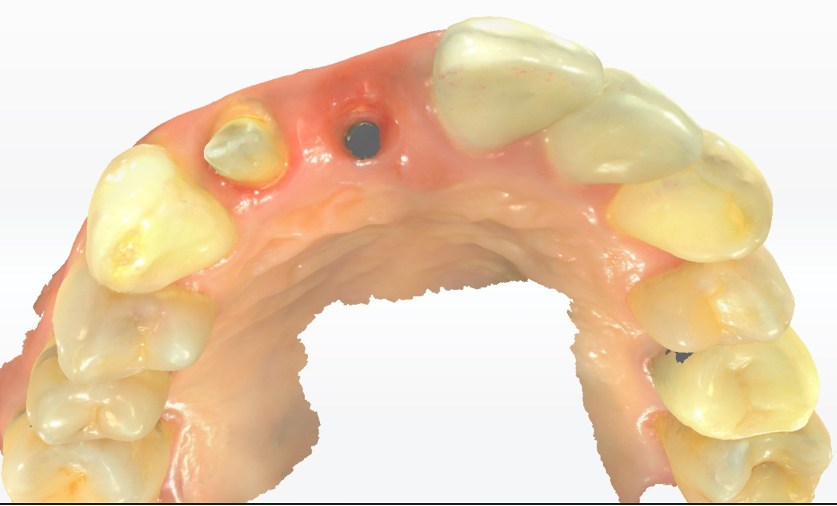
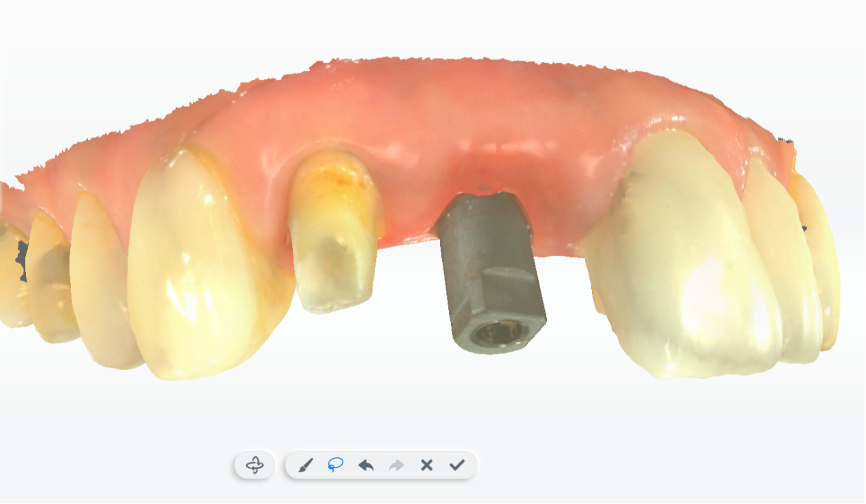
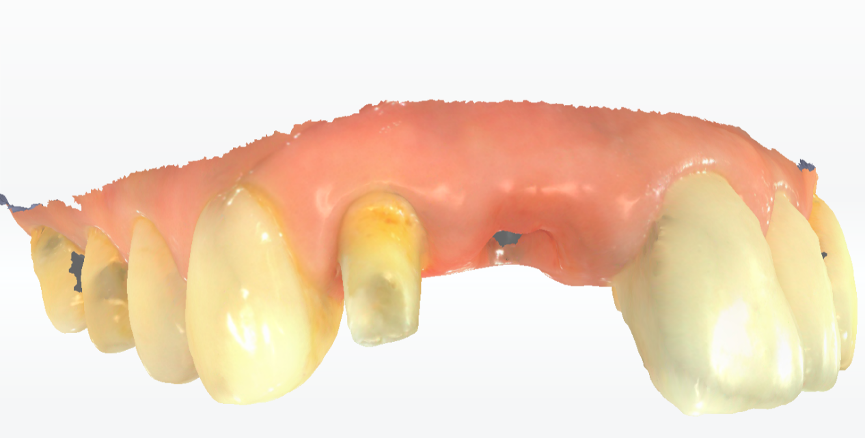
Fig 10,11,12: The intraoral data of the patient’s temporary restorations
And the implant-supported temporary was made to shape the gingival.

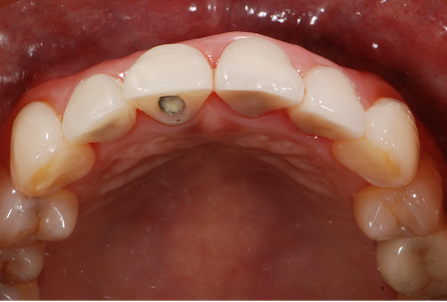
Fig 13,14: Shaped gingival
Three Month Follow Up After Temporary Restorations
The dentist checked and removed the temporary restorations and took a digital impression for the final restorations.

Fig 15: The digital impression for the final restorations
The dental technician made the final zirconia restorations with this digital impression.
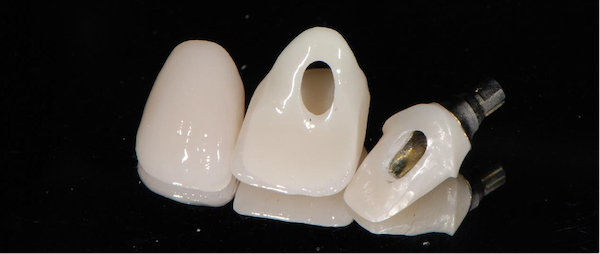
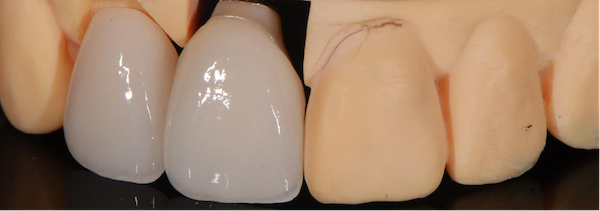
Fig 16,17: The final zirconia restorations with the dgital impression
Final Zirconia Restorations in Patient’s Mouth
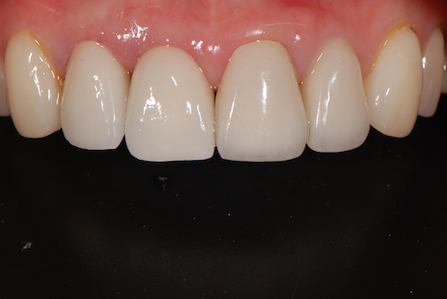
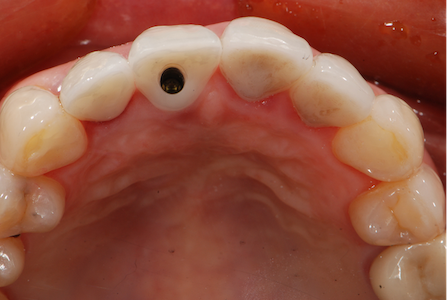
Fig 18,19: Final zirconia restorations in patient’s mouth
Case Summary
In this anterior dental implant restoration, adjusting the axis orientation of the implant body to an ideal position for the screw access channel is a key factor for the final success of this case. Designing the surgical guide before the operation to simulate the shape of the teeth in later treatment was imperative. Implant treatment planning along with the use of a surgical guide is a successful way to achieve long-term stability of an implant restoration.
With the opening of the screw access at the palatal side, the prosthesis can be bonded outside of the mouth. The restoration can be fixed on the implant body with screw retention, effectively avoiding problems such as adhesive residue.
To achieve a good esthetic result, titanium bases with zirconia abutments and porcelain crowns are usually used for the restoration. After all parts fit well, the abutment and crown are bonded outside the mouth and fixed inside the mouth with screws. This method can not only facilitate the adjustment of the color and shape of the restoration, but also avoid residues of the bonding agent in the mouth.
The use of temporary restorations in implant cases are helpful to reshape the emergence profile of the gingiva. By adjusting the gingival shape and gingival margin contour of the prosthesis, the optimal gingival morphology can be obtained.