 ENG
ENG


The Aoralscan Elite is the latest member to Shining3D’s dental family, it integrates photogrammetry into the intraoral scanner. This two in one innovative technology helps dentists to achieve exceptional accuracy in intraoral scan data, particularly beneficial for implant cases where precision is critical.
In a recent case study conducted by Dr. Abdelrahman Khalaf and Dr. Kirollos Hany from the Faculty of Dentistry at Assiut University in Egypt, the capabilities of the Aoralscan Elite were showcased. This study highlights the potential of the Aoralscan Elite in enhancing the quality of dental restorations in all-on-X implant cases.

Fig 1: Dr. Abdelrahman Khalaf and Dr. Kirollos Hany
Case Profile
The patient is a 59-year-old male. The first operation was performed in April 2024, during which four implants were placed and immediate temporary restorations were made. Now, permanent restoration is required.
Oral Health Examination Before Permanent Restoration
The healing of the maxillary gingiva is progressing well, with no signs of significant inflammation or infection in the soft tissue. X-ray reveals that all implants are securely integrated with the alveolar bone, showing no signs of inflammation or noticeable bone resorption.

Fig 2: four implant bodies in the upper jaw that were placed by dentist three months ago, and the gingiva is healthy without any swelling now.
Treatment Process
The dentist captured the intraoral scan data using Aoralscan Elite and coded the scanbody. It is a very efficient workflow.

Fig 3: the Aoralscan Elite and coded scanbody
Below is the detailed scanning process:
First, remove the old restorations and scan the soft tissue of the upper edentulous jaw using IPG scanner tip, which offers a larger scanning area. This reduces cumulative errors associated with data stitching and produces a more stable scan quality.
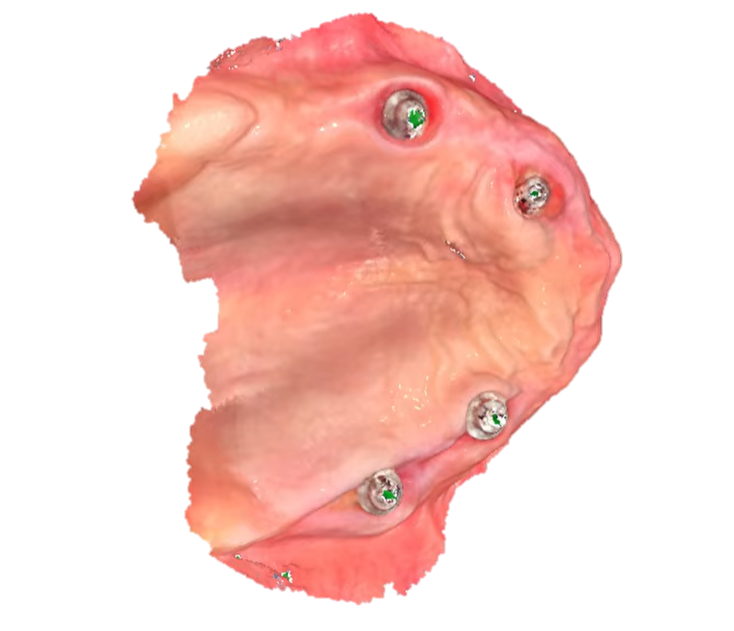
Fig 4: the upper edentulous jaw scan data
Second, install the coded scan body onto the MUA, ensuring that each coded scanbody is properly positioned with its end facing towards the center as much as possible, and tighten it using a torque wrench.
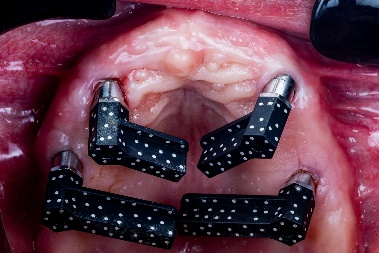
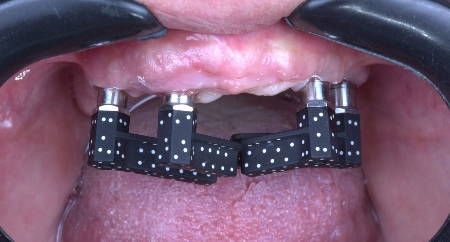
Fig 5, 6: the coded scanbodies were placed in the patient’s mouth
Third, ensure that the coded scanbodies are clean without any blood, as it will affect the recognition of markers on the coded scanbodies. Scan from one coded scanbody and follow a consistent, continuous path to scan all of them. Once you have captured enough markers on the coded scanbody, a virtual representation of the CAD data will appear on the scanning interface.

Fig 7: The coded scanbody CAD data
Fourth, scan the base of the coded scanbody and the adjoining soft tissue areas until the data from both align at the center of the interface, indicating the completion of matching. Then select the corresponding implant library from the database to finish the transition process.